Table of Contents
Ah, the magical golden hour – that dreamy time when the sun decides to put on its best show and turn your ordinary car photos into absolute masterpieces! Trust me, there’s nothing quite like watching your pride and joy bathed in that warm, honey-coloured light that makes every curve and contour pop.
“But when’s the best time to snap these gorgeous shots?” I hear you ask. Well, my friend, let me tell you – forget about that harsh midday sun that turns your beautiful black car into a mirror and your white one into a glowing spaceship.
Nobody wants those unflattering shadows making your car look like it’s having a bad hair day! Avoid harsh light by planning your shoot when the sun is lower in the sky, which helps to diffuse sunlight and reduce harsh shadows.
Here’s the real secret sauce: plan your photoshoot for those golden moments just after sunrise or before sunset. Think of it as nature’s very own Instagram filter – but better! For afternoon shoots, I typically head out after 3 PM when the sun’s stopped playing hide and seek behind those pesky spring clouds.
But wait! Before you grab your camera and dash out the door like an excited puppy, there’s one tiny detail we need to sort – temporary car insurance. (Yes, I know, boring admin stuff, but trust me, it’s as important as bringing your camera’s memory card!)
Sound overwhelming? Don’t worry! I’m about to walk you through everything you need to know about capturing those jaw-dropping golden hour shots this spring. From picking the perfect spot (no, your neighbour’s overgrown hedge won’t cut it) to mastering those tricky camera settings – I’ve got your back!
Getting your car ready for spring photos
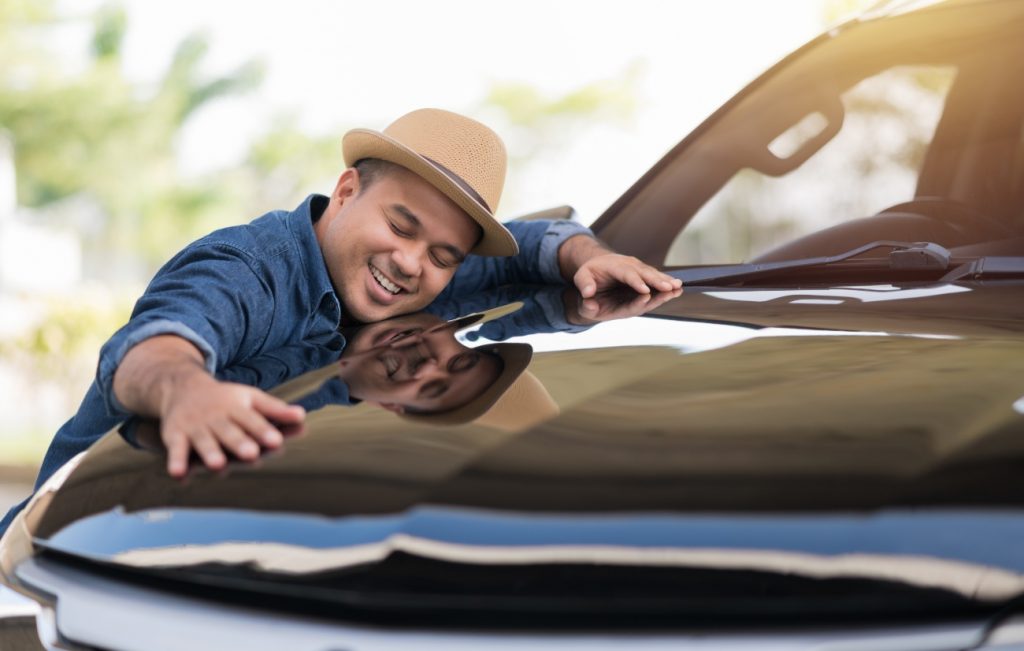
Let’s talk about getting your four-wheeled friend ready for its glamour shots! You wouldn’t show up to a photoshoot covered in last night’s takeaway, would you? Well, your car deserves the same courtesy! Car fans can also assist with the preparation, helping to arrange and optimize the set for a smoother and more effective photo shoot.
Clean and prepare your vehicle
Winter’s been a proper beast to your car, hasn’t it? Those salty roads and muddy puddles have left their mark, making spring the perfect time for a proper scrub-up. Trust me, those wheel arches are hiding more grit than a seaside sandwich!
Ready for the ultimate spa treatment? Here’s my tried-and-tested cleaning ritual (and yes, it’s as detailed as my gran’s tea-making process):
Give it a good pre-rinse (think of it as removing your car’s winter jacket)
Slather on that citrus pre-cleaner (because stuck-on grime is stubborn as a mule)
Snow foam time! (It’s like a bubble bath for your car)
Use the two-bucket method (one for washing, one for rinsing – don’t be a savage!)
Dry with microfibre towels (pat dry, like you’re handling a precious newborn)
When cleaning, remember to capture the entire vehicle in your photos, starting with wide shots that encompass the whole car and gradually moving in to capture all angles and details, including the interior and engine.
Now for the finishing touches that’ll make your car pop like a firework on New Year’s Eve! Dress those tyres until they’re blacker than a midnight sky. And keep those detailing sprays handy – cars are proper dust magnets, and even the tiniest movement can kick up enough dust to rival a desert storm!
Check temporary insurance coverage
Right then, let’s chat about the boring-but-necessary bit – insurance! (Don’t roll your eyes at me, this is important stuff!)
Temporary car insurance swoops in like a superhero, offering top-notch comprehensive protection. It’s got your back for:
Comprehensive cover as standard, so you have a high level of cover when you’re out and about
Involved in an accident with another car. If you’re at fault there’s cover for claims by the third party for personal injury or damage to their property.
Cover against accidental damage and malicious damage, vandalism, fire or theft to the car that you are borrowing.
The brilliant bit? You can tailor it faster than a bespoke suit – anywhere from one hour to 28 days! Perfect for those “just one more shot” moments that turn into full-day photography adventures.
It’s particularly handy if you’re borrowing your mate’s fancy motor for a shoot or taking your weekend warrior out for a spin. Just remember, it won’t help with your no-claims bonus – but hey, you can’t have everything in life, can you?
Understanding golden hour photography
Ever wondered why some car photos look like they’ve been blessed by the photography gods, while others look like they were taken with a potato? The secret, my friends, lies in that magical time photographers call the golden hour!
Adjusting your camera settings to let in more light, such as using a lower f-stop or increasing the ISO, can enhance the quality of your golden hour shots.
What is golden hour?
Picture this: twice a day, Mother Nature decides to be an absolute legend and gives us the perfect lighting for car photography. It happens when the sun’s playing hide and seek with the horizon, sending its rays through more atmosphere than usual. The result? Light that’s softer than a puppy’s belly and warmer than your gran’s cuppa, hitting around 3,500K on the colour temperature scale.
The best part? Those harsh shadows that usually make your car look like it’s having an identity crisis? Gone! Instead, you get these gorgeous, gentle shadows that make your pride and joy look like it belongs in a museum.
Best times to shoot in spring
Right then, let’s get down to the nitty-gritty of spring timing (and trust me, timing is everything – just ask anyone who’s ever missed their bus by 30 seconds!).
Morning people, set your alarms for 7:00 am to 8:30 am. Night owls, you’re looking at 6:00 pm to 7:30 pm. That gives you roughly an hour to capture pure magic – no pressure!
Spring sunsets are particularly spectacular, throwing out colours that’d make a rainbow jealous. Plus, the weather’s actually bearable – no more frozen fingers fumbling with camera settings! (Just make sure your temporary insurance hasn’t expired while you’re chasing that perfect shot!)
Using weather apps for planning
Let’s talk about weather apps – your new best friends in the quest for the perfect shot. Here’s my tech toolkit (and yes, I’m a bit of a weather app nerd):
Sun surveyor: Your personal golden hour crystal ball
Astrospheric: For those who need to know their clouds like the back of their hand
PhotoPills: The mathematician of golden hour planning
These clever little apps help you keep an eye on those pesky clouds. Clear skies? Brilliant! You’ll get colours warmer than a summer barbecue. Got some clouds? Even better! They’ll add more drama to your shots than a soap opera.
Trust me, nothing beats checking these apps and scouting locations beforehand – it’s like having a backstage pass to Mother Nature’s light show!
Oh, and here’s a pro tip: double-check your temporary insurance timing matches your shooting schedule. Golden hour changes more often than British weather, especially during spring!
Important camera settings for car photography
Right then, let’s dive into the nitty-gritty of camera settings! I know, I know – it sounds about as exciting as watching paint dry, but trust me, these little numbers make the difference between a proper stunner and something that looks like it was shot with your gran’s disposable camera.
A skilled car photographer masters various shooting techniques and gear to capture automobiles effectively, turning car photography into both a personal passion and a professional endeavor.
Aperture and depth of field
Let’s talk about aperture, shall we? Think of it as your camera’s pupil – the wider it is, the less of your car stays in focus. For those full-body shots where you want your motor looking sharp as a tack, stick to f/8 to f/11.
But if you’re getting up close and personal with those shiny badges or that posh interior, go wider with f/2.8 to f/5.6 for that lovely blurry background effect. Remember, shooting cars from multiple angles ensures you capture all the significant features and details.
Got yourself a proper long vehicle? (I’m looking at you, estate car owners!) Here’s what you need to remember:
Focus further down your car (the front’s not everything, you know!)
Pop it up to f/11 or f/16 for those full-car shots
Dial it back to f/5.6 when you’re showing off those detail bits
Shutter speed basics
Now, shutter speed’s a bit like making tea – too quick and you’ll miss the flavour, too slow and everything goes cold! For stationary shots, keep it at 1/125 second or quicker to avoid any wobbles.
Practicing to shoot cars can significantly improve your skills, as it helps you understand how different lenses and camera settings like shutter speed affect the quality of car shots.
Here’s my cheeky guide for different scenarios (and yes, I’ve learned these the hard way!):
Want to freeze the action? Whack it up to 1/1000 second
Fancy those artistic blurry background shots? Try 1/30 second
Following a moving car? Match your speed (40mph = 1/40 second – clever, eh?)
For those interior shots, you might need to bump up your ISO a bit – unless you fancy lugging a tripod around like a photography pack mule. And don’t forget to check your temporary insurance coverage! The last thing you want is to run out of time just when you’ve found your groove with these settings.
Remember, these numbers aren’t set in stone (unlike my neighbour’s garden gnomes). They’re more like guidelines for getting those proper professional-looking shots. Now, go forth and start clicking!
Helpful gear for automotive photography
Alright, car photographers, let’s talk gear! You wouldn’t show up to a race without your helmet, right? The same goes for automotive photography – having the right equipment is crucial for capturing those jaw-dropping car shots.
Must-have equipment for car photography
First things first, let’s get your kit sorted. Here’s the lowdown on the must-have gear for any car shoot:
Camera body: A full-frame DSLR or mirrorless camera is your best mate here. These bad boys offer top-notch image quality and flexibility, perfect for capturing every sleek line and shiny detail of your car.
Lenses: Variety is the spice of life, and the same goes for lenses. Start with a versatile 24-70mm lens for those all-around shots. If you’re feeling fancy, a 70-200mm lens will help you nail those distant, dramatic angles.
Tripod: A sturdy tripod is like your car’s suspension – it keeps everything steady. Huge help for sharp images, especially when the light’s playing hard to get.
Reflectors: These are your secret weapon for bouncing light into those tricky spots. Think of them as your portable sunshine.
Lighting: Sometimes, Mother Nature needs a little help. Extra lighting can set the mood and highlight your car’s best features, making it look like it’s ready for its close-up.
Choosing the right lenses and accessories
Now, let’s get into the nitty-gritty of lenses and accessories. Picking the right ones can make your car shots go from “meh” to “magnificent”!
Focal length: For those wide, sweeping shots, a shorter focal length (like 24mm) is your go-to. Want to capture your car from afar? A longer focal length (like 200mm) will do the trick.
Aperture: A wide aperture (around f/2.8) is perfect for that dreamy, blurred background, making your car pop like a superstar.
Image stabilization: This is your best mate for reducing camera shake, especially in low light. No one likes a blurry car shot!
Filters: Polarising filters are brilliant for cutting down glare and making colors pop. Neutral density filters? They’re your ticket to creating moody, atmospheric shots by reducing the light.
With the right gear in your arsenal, you’re all set to capture car images that’ll make any car fan’s heart race!
Choosing the perfect spring location
You wouldn’t take your date to a rubbish dump, would you? Well, the same goes for your car’s photoshoot location! The perfect backdrop can make your motor look like it’s just rolled off a magazine cover, while the wrong one… well, let’s just say it could make your pride and joy look about as appealing as yesterday’s fish and chips.
The automotive world significantly influences the choice of locations for car photography, as industry trends and aesthetics often dictate the most appealing and relevant settings.
Natural backdrops
Spring’s like nature’s own art gallery, offering up some proper gorgeous settings for your automotive masterpiece. Fancy something a bit different? Small airports are absolute gold mines – nothing says “epic shot” quite like positioning your car under an aircraft wing!
Or take a drive through some winding forest roads – they’re brilliant for showing off your car’s sultry curves. When using these natural backdrops, ensure you capture the entire vehicle to highlight its full beauty.
Before you dash off to that perfect spot you’ve got in mind, here’s my checklist (learned the hard way, I might add):
Can you actually drive there? (Sounds obvious, but you’d be surprised!)
Have a proper nosey around first – scout those angles
Keep an eye on that British weather (always playing tricks, isn’t it?)
Make sure there’s room for all your photography bits and bobs
Double-check your temporary insurance covers the spot
Urban settings
Now, let’s talk city scenes – they’re like a playground for car photographers! Those restored buildings and industrial zones? Pure magic for creating contrast. And if you can find yourself some swanky mid-century architecture or modern developments, well, that’s the cherry on top for cars with plenty of chrome.
Post-production plays a crucial role in enhancing these car photographs by combining different exposures and elements captured during the shoot to create a final polished image.
Timing’s everything in urban spots. Early mornings are brilliant – fewer people about, making it easier to get that perfect shot. Evening shoots can be proper magical too, with all those city lights twinkling away (just make sure your temporary insurance covers those late-night creative sessions!).
Avoiding common location mistakes
Right then, here’s what not to do (and believe me, I’ve seen some proper howlers in my time). First off, avoid backgrounds busier than Oxford Street on a Saturday – power lines, bins, random cars – they’ll all steal the spotlight from your motor.
Match your location to your car’s personality, for heaven’s sake! A Ferrari in front of Tesco? That’s about as wrong as putting ketchup on a Sunday roast. Instead, find somewhere that makes sense – maybe a grand cathedral or a stunning bridge.
Here’s a nifty little tip: got a dark car? Find yourself a lighter background. Bright car? Do the opposite. And if you’ve got yourself a purple beauty, well, you’ll need to be pickier than my aunt at a buffet.
Oh, and please, please tidy up any rubbish before you start snapping. Nothing ruins a shot quite like a stray crisp packet photobombing your masterpiece. Last but not least, make sure your temporary insurance has got you covered wherever you’re shooting – better safe than sorry, eh?
Experimenting with angles and composition
Alright, let’s get creative! Experimenting with different angles and compositions can turn your car shots from ordinary to extraordinary. It’s all about finding that unique perspective that makes your car look like it’s ready for the red carpet.
Creative perspectives for dynamic shots
Low-angle shots: Get down and dirty! Shooting from a low angle can make your car look powerful and dramatic, emphasising those sleek lines and curves. It’s like giving your car a superhero stance.
High-angle shots: Climb up high and capture your car from above. This angle gives a sense of grandeur and majesty, making your car look like it’s ruling the road.
Wide-angle shots: Use a wide-angle lens to capture the whole car and its surroundings. This creates a sense of space and context, showing off your car in its natural habitat.
Macro shots: Get up close and personal with those intricate details. Whether it’s the badge, the interior stitching, or the wheel rims, macro shots add a touch of intimacy and craftsmanship to your car photography.
Panning shots: Want to show off your car’s speed? Panning shots are your best bet. Follow the car with your camera to create a sense of movement and energy, making it look like it’s zooming right out of the frame.
By playing around with different angles and compositions, you’ll capture car shots that are as unique and dynamic as the cars themselves. So go on, get creative, and let your car photography shine!
Working with spring lighting conditions
Let’s chat about lighting – the make-or-break element that turns your car photos from “meh” to “magnificent”! Spring weather’s about as predictable as my cat’s mood swings, but that’s what makes it exciting, right? It’s important to avoid overly bright, clear skies that create harsh light, as this can negatively impact the quality of your images.
When shooting in spring, you might encounter a mix of sunny and overcast days. While sunny days are great, overcast weather can diffuse sunlight and reduce harsh shadows. Using reflectors effectively can help manage the light and enhance your photos.
Managing harsh shadows
Listen, that midday sun is about as flattering as your passport photo – those overhead shadows will make your car look like it’s having an identity crisis! Throughout spring mornings and afternoons, you’ll want to play a clever game of shadow chess with your motor. The golden rule? Keep part of your car in shadow while letting the other bit bask in the spotlight. Also, avoid harsh light by steering clear of overly bright, clear skies that can create unflattering shadows.
When you’re shooting outside those dreamy golden hours, here’s my shadow-taming tricks (learned from many, many failed attempts):
Let trees and buildings be your natural light-softeners
Position your car so those shadows actually show off its lovely lines
Give your motor a little spin to hide those pesky reflections
Keep an eagle eye on those body panel reflections
Think of shadows as your artistic friends – they’ll add more depth to your car than a philosopher at a coffee shop! Just make sure your temporary insurance covers all that car shuffling – finding the perfect shadow spot is like trying to catch a soap bubble!
Using reflectors effectively
Now, let me introduce you to your new best friend – the reflector! These shiny lifesavers are brilliant at bouncing light into those gloomy spots, like a torch in a cave. Reflectors can also help in letting in more light, enhancing your camera settings by allowing a lower f-stop and managing ISO to avoid noise.
Here’s my foolproof reflector recipe (and trust me, I’ve had more reflector disasters than hot dinners):
Keep them close but hidden – like a ninja with a mirror
White or silver for that natural glow – nothing too fancy
Gold reflectors when you want that warm, toasty look
Black ones for those moody, dramatic shots
Pop these clever little light-bouncers near those tricky spots – under-bumpers, wheel arches, all those shadowy bits. Just remember, spring winds can be proper cheeky – you might need a mate to hold them steady (or they’ll fly off like Mary Poppins!).
They’re particularly brilliant on those typical British overcast days. Just make sure your temporary insurance covers you while you’re playing around with positions – sometimes the perfect spot isn’t always the most convenient!
One last thing – even with all these fancy reflector tricks, that midday sun is still a pain in the neck. Time your shoot right, manage those shadows like a pro, and you’ll have photos that’ll make your car look better than a fresh cuppa on a Monday morning!
Conclusion
Well, what a journey this has been, eh? From chasing that perfect golden hour light (like trying to catch a rainbow!) to making your car shinier than a freshly polished teapot. Who knew car photography could be such an adventure?
Remember when we started, scratching our heads about camera settings? Those technical bits might seem trickier than solving a Rubik’s cube blindfolded, but trust me, they’ll become as natural as dunking a biscuit in your tea before you know it!
The secret sauce? It’s all in the planning, my friends. Sort out that temporary car insurance (boring but essential!), find a location that makes your car look like a proper superstar, and play nice with Mother Nature’s lighting department. Sometimes you’ll need more patience than a saint waiting for those perfect conditions – but cor blimey, is it worth it!
Spring weather can be more unpredictable than my aunt’s cooking, throwing both spanners and golden opportunities your way. But that’s half the fun, isn’t it? Armed with your newfound knowledge (and that all-important temporary insurance), you’re ready to tackle whatever challenges come your way.
So what are you waiting for? Get out there and start capturing those stunning shots. Your car’s ready for its close-up, and thanks to this guide, so are you! Just remember to have fun with it – after all, the best photos are taken with a smile (and valid insurance, of course)!
Frequently asked questions
What camera settings are best for car photography during golden hour?
For golden hour car photography, use a low ISO (100-400) to minimise noise, an aperture between f/5.6 and f/11 for good depth of field, and a shutter speed of 1/60 to 1/250 seconds. Adjust these settings based on the available light and your creative vision.
How can I manage harsh shadows when photographing cars in spring?
To manage harsh shadows, avoid shooting during midday sun. Position the car so that part of it is in shadow while another catches direct light. Use natural diffusers like trees or buildings, and consider using reflectors to bounce light onto shadowed areas for more balanced illumination.
What are some ideal locations for spring car photography?
Spring offers various location options. Natural settings like forests or winding roads can create dynamic environments. Urban locations with interesting architecture can provide striking contrasts. Small airports or restored buildings can also serve as excellent backdrops. Ensure the location complements your car’s character.
How important is car preparation for a photoshoot?
Car preparation is crucial for high-quality photos. Thoroughly clean your vehicle, paying special attention to wheel arches and crevices. Apply tyre dressing for a rich finish, and keep detailing spray and polishing cloths handy for quick touch-ups during the shoot.
